- How It Works
- 24/7 Privacy Monitoring
- Delete Your Info From Google
- Setup Trusted Companies
- Protect Your Family
- Business Services
Instant Checkmate Opt-Out Guide: How to Remove Your Personal Information
Overview:
What is Instant Checkmate?
Instant Checkmate is a people-search platform that compiles public and online records into background-style reports. It allows users to look up individuals by name, phone, or other details to uncover personal and historical information.
Types of personal information they expose:
- Names
- Nicknames/Aliases
- Birth Date
- Approximate Age
- Past and Present Addresses
- Phone Numbers
- Email Accounts
- Work History
- Educational Background
- Property Ownership or Licenses
- Criminal, Court, and Traffic Records
- Social Media Accounts
Risks to privacy if the data is not removed:
If data remains stored on data broker sites such as Instant Checkmate, it may be misused for fraudulent activities, exposing individuals to unsolicited contact, phishing attempts, identity theft, social engineering attacks, or broader privacy violations. Business professionals may also be targeted by persistent or invasive sales tactics.
Why this guide exists:
This type of guide is created to explain what Instant Checkmate does, highlight the personal data it shares, outline the risks of leaving that data exposed, and provide steps for removing information to help protect privacy.
This step-by-step guide will walk you through the process of opting out of Instant Checkmate.
Opt-Out Process at a Glance
- Time to Complete: 5-10 minutes
- Information Required: Full Name, Email Address, and Date of Birth
- Verification Required: Yes - Email Confirmation
- Data Removal Timeline: 3 to 45 days
- VPN Required: No
Step-by-Step Opt-Out Instructions
Step 1: Navigate to PeopleConnect
- Instant Checkmate is an affiliate to Intelius. To opt-out of Instant Checkmate database, users must follow Intelius' opt-out process through its parent company, PeopleConnect.
- Access the data broker's opt-out site: https://suppression.peopleconnect.us/login
Step 2: Suppression Center
- Enter your Email Address in the box provided.
- Tick the verification check box.
- Click 'Continue'.

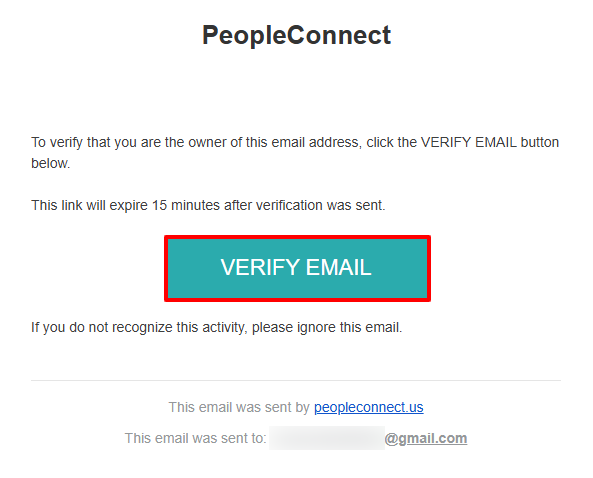
Step 5: Email Verification
Once a confirmation email is sent, open it and click 'Verify Email' to complete your request.
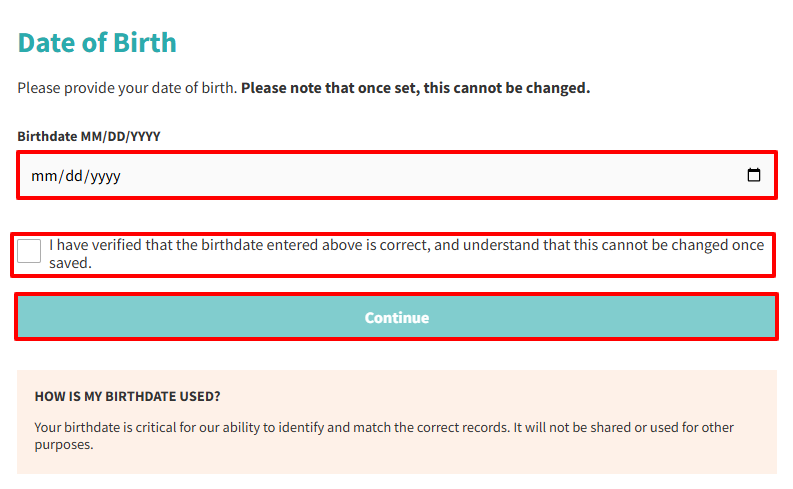
Step 6: Confirmation of Date of Birth
After verifying your email, you will be redirected back to the website.
- Enter your Date of Birth.
- Tick the verification box to confirm that the birthdate provided is correct. This cannot be changed once saved.
- Click 'Continue'.
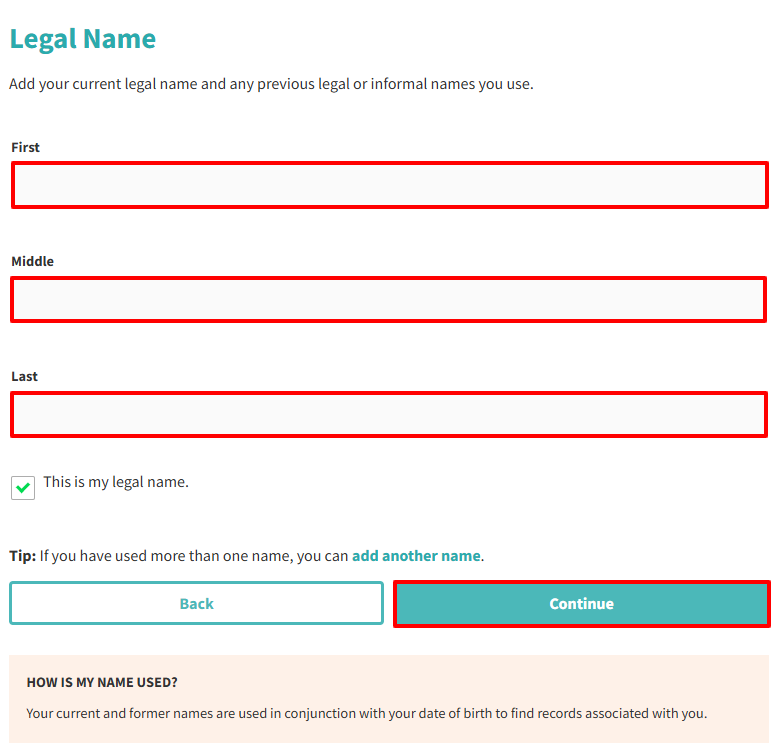
Step 7: Fill Out Legal Name
- Enter your First Name, Middle Name (optional), Last Name.
- Tick the check box confirming that this is your legal name.
- Optionally, if you have used more than one name, you can add it to your request by clicking 'add another name'.
- Click 'Continue'.
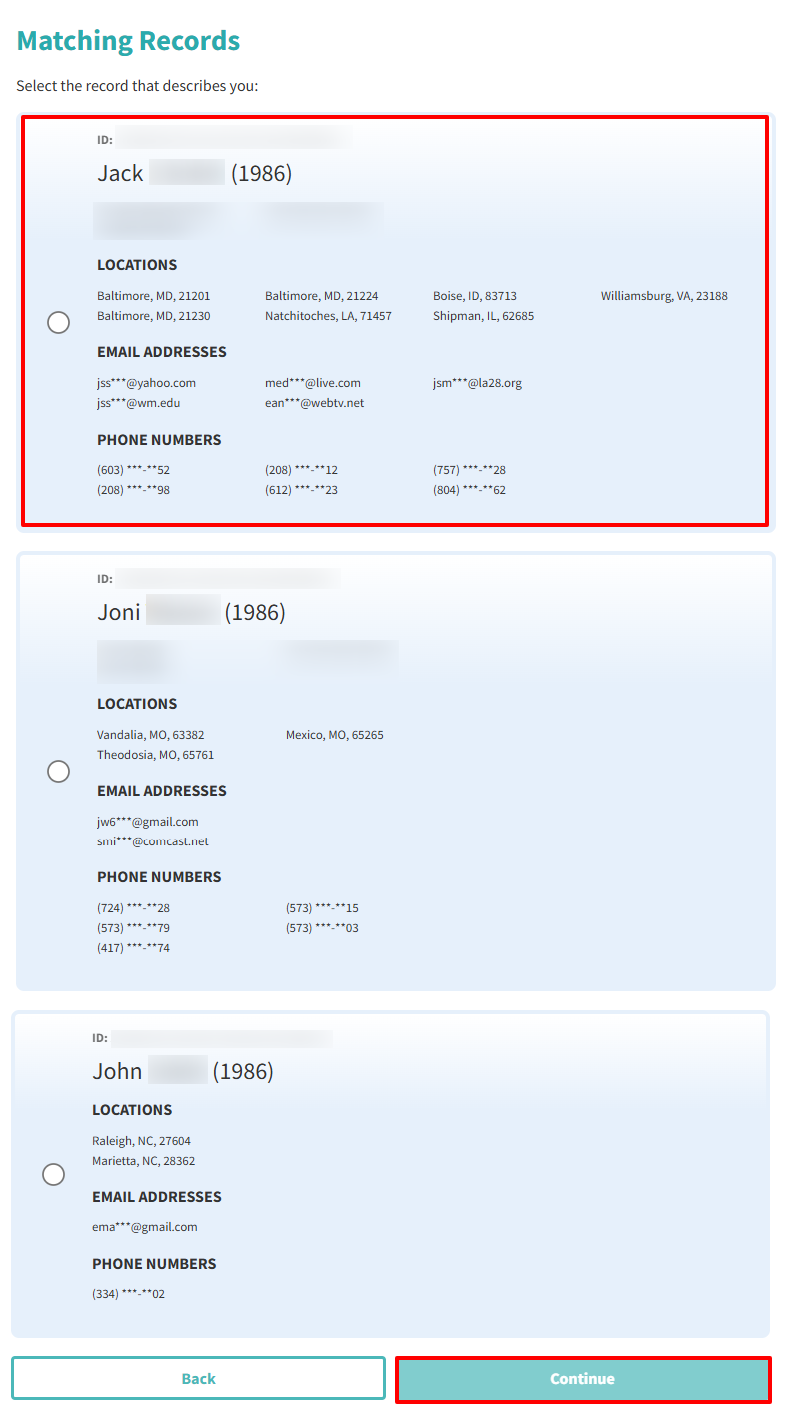
Step 8: Matching Records
- Select the record that describes you.
- Click 'Continue'.
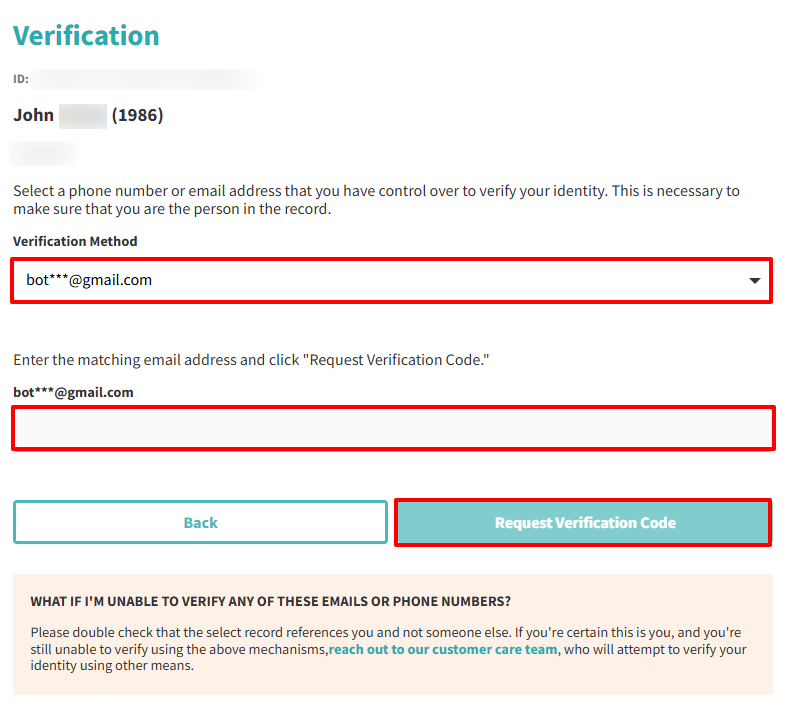
Step 9: Verification
- Choose the phone number or email address you want to use for verification.
- Enter the matching email address.
- Click 'Request Verification Code.'
Step 10: Confirmation of Request
After you receive the email, click the verification link so your request can be processed.
Additional Notes
- Use a masked/disposable email to minimize future contact.
- Monitor your spam/junk folder for the confirmation link.
- Listings may persist in search engine caches even after removal.
- Re-check every few weeks to ensure your info doesn't reappear.
Need Help?
If you struggle with the removal process from Instant Checkmate, consider reaching out to third-party services like Privacy Bee, which specialize in handling opt-outs from data brokers.